Keychain Access is a manager of account names, passwords, and credit card information that allows values entered once on one device to be stored on another using iCloud. With its help, you can get rid of the need to enter the same thing to log in to websites or pay for goods and services through Safari on iPhone, iPad and Mac computers. Whether or not to trust your data to Apple’s cloud service is an individual matter for everyone. However, you must be aware that all of them are stored on the company’s servers in encrypted form and cannot be viewed by company employees.
So how do you set up and use Keychain on iPhone and iPad on iOS 7?
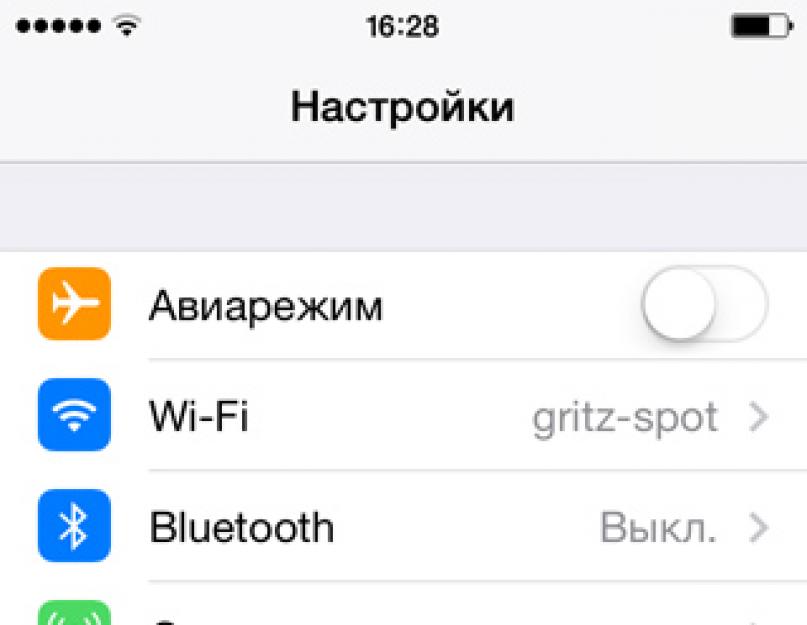
1. Go to the “Settings” application of the iOS 7 operating system:

2. Go to the iCloud section:

3. Go to the “Keychain Access” menu:

4. Move the function enable switch to the active position (you may need to enter your Apple ID account password):

5. Create, enter and repeat the iCloud security code to restrict access to the Keychain function:

6. Select your country of residence, enter your phone number and confirm the data by clicking the “Next” button:

7. Now, when entering account or credit card data on Internet pages in Safari, the user will be offered the opportunity to save them for later access from other devices:

Thus, by setting up the Keychain feature on all your devices, you can get rid of the need to enter your account information on numerous services over and over again, entering it only once on one of the devices linked to one Apple ID.
Two-factor authentication is an additional layer of Apple ID security that ensures only you can access your account, even if someone else knows your password.
How it works
When using two-factor authentication, account access is only possible from trusted iPhone, iPad, or Mac devices. When you sign in to a new device for the first time, you'll need to provide two pieces of information: your password and a six-digit numeric verification code that automatically appears on trusted devices. After entering the code, the new device is included in the list of trusted devices. For example, if you have an iPhone, the first time you sign in to your account on your newly purchased Mac, you will be prompted to enter your password and verification code, which will automatically appear on your iPhone screen.
Because two-factor authentication requires more than just a password to access your account, the security of your Apple ID and the data stored on Apple servers increases significantly.
Once you sign in, you will no longer be prompted for a verification code on that device until you are completely signed out, all data on the device is erased, or you need to change your password for security reasons. When you sign in online, you can specify that your browser is trusted so that you won't be prompted for a verification code the next time you sign in from that computer.
Verified devices
A verified device can be an iPhone, iPad, or iPod touch running iOS 9 or later, or a Mac running OS X El Capitan or later and signed in using two-factor authentication. This is a device that we know you own and can be used to verify your identity by displaying an Apple verification code when you sign in from another device or browser.
Verified phone numbers
A verified phone number is a number that can be used to receive verification codes through text messages or automated phone calls. You must verify at least one trusted phone number to have access to two-factor authentication.
You should also consider confirming other trusted numbers that you may have access to, such as your home phone number or a number used by a family member or close friend. You can use these numbers if you temporarily lack access to your own devices.
The verification code is different from the one you enter to unlock your iPhone, iPad, or iPod touch.
Set up two-factor authentication for your Apple ID
Two-factor authentication is currently available to iCloud users with at least one device running iOS 9 or OS X El Capitan or later. .


Entering and confirming a trusted phone number
Enter the phone number to which you want to receive verification codes when logging in. You can choose to receive codes via text messages or automated phone calls.
Enter the verification code to verify your phone number and enable two-factor authentication.
On a Mac running OS X El Capitan or later, follow these steps:

- Go to Apple menu > System Preferences > iCloud > Account.
- Click the Security icon.
- Click "Enable Two-Factor Authentication."
Some Apple IDs created with iOS 10.3 or macOS 10.12.4 and later are protected by two-factor authentication by default. In this case, two-factor authentication will already be enabled.
If you use two-step verification and want to improve your security, .
If you can't enable two-factor authentication for your account, you can still protect your information.
Things to remember when using two-factor authentication
Two-factor authentication greatly enhances Apple ID security. Once this feature is enabled, you will need a password and access to verified devices or a verified phone number to sign in to your account. To ensure maximum account protection and continued access, there are a few simple guidelines to follow:
- Remember your Apple ID password.
- Use passcodes for all your devices.
- Update verified phone numbers promptly.
- Ensure physical security of verified devices.
Account Management
You can manage your verified phone numbers, verified devices, and other account information on.
Timely updating of verified phone numbers
To use two-factor authentication, you will need to have at least one verified phone number in your database to which you can receive verification codes. To update verified phone numbers, follow these steps:
- Go to the Security section and click Edit.
If you need to add a phone number, click Add Verified Phone Number and enter the phone number. Select how you want to verify your number (text message or automated phone call) and click Continue. To remove a verified phone number, click next to the phone number you want to remove.
View and manage verified devices
You can view and manage your list of verified devices in the Devices section of your Apple ID account page.
- Go to your Apple ID account page.
- Sign in with your Apple ID.
- Go to the "Devices" section.
Creating passwords for programs
If you use two-factor authentication to sign in to your account from third-party programs and services, such as email, contacts, or calendar applications that are not developed by Apple, you will need it. To create a password for the program, follow these steps:
- Sign in to your Apple ID account page.
- Click the Create Password button in the Application Passwords section.
- Follow the instructions on the screen.
After creating a password for the program, enter or paste it into the password field in the program in the usual way.
Help and FAQs
Help is needed? You may find answers to your questions below.
Is this different from Apple's current two-step verification?
Yes. Two-factor authentication is built directly into iOS, macOS, tvOS, watchOS and Apple websites. It uses different methods to confirm verified devices and provide verification codes and optimizes the overall experience. Two-factor authentication is required to use certain features that require enhanced security.
What should I do if I don't have access to a verified device or I haven't received a verification code?
When logging in without a trusted device on hand that displays the verification code, the code is sent to a verified phone number via or automatic phone call. Click "Code Not Received" on the login screen and choose to send the code to a verified phone number. The code can also be obtained directly on the verified device in the “Settings” menu. .
How do I regain access to my account if I can't sign in?
If you can't sign in, reset your password, or receive verification codes, you can. Account recovery is an automatic process that will help you gain access to your account as quickly as possible and prevent possible access by others purporting to be on your behalf. This may take a few days - or longer - depending on how much account information you can provide to verify your identity.
Do I now need to memorize answers to security questions?
No. With two-factor authentication, you don't have to select security questions and remember the answers. Your identity is established solely through the password and verification codes sent to your devices and trusted phone numbers. When you start using two-factor authentication, we store your security questions for two weeks in case you need to revert back your account security settings. After this, the questions will be deleted.
Can Apple Support help me regain access to my account?
This authentication method, in addition to the password, always requires confirmation of identity using a trusted device. You cannot log into your account simply by knowing your login and password.


Two-Step Verification works for:
- Login to your Apple ID account page;
- Sign in to iCloud or iCloud.com from a new device;
- Sign in to iMessage, Game Center or FaceTime;
- purchases from the iTunes Store, App Store, or iBooks Store on a new device;
- obtain information on your Apple ID from Apple Support.
To enable two-step verification for Apple ID:
- Go to appleid.apple.com and log in with your Apple ID;
- Security → Two-Step Verification → Configure;
- Enter answers to security questions.
- Enter your mobile phone number, which will receive a verification code;
- Enter the verification code in the browser field that appears;
- Select and list your devices that can be used for authorization;
- Save Recovery key.

The recovery key is a very important thing; you must save it somewhere. The problem is that you cannot copy this key using the Cmd C combination. Therefore, you will have to write it down manually or take a screenshot. Many people take a screenshot and it simply gets lost. I somehow got caught in this too. So be sure to save it to 1Password.
READ ALSO:The recovery key is also important because an attacker can mess things up without logging into your account. If he guesses the password and then enters the verification code several times, the account will be blocked. The lock can only be unlocked using a recovery key.
I recently fell for this myself when I bought a new iPad Pro at the airport and tried to set it up right there. I had two-step verification enabled, but due to poor internet the codes were not being received. I tried sending them several times on the iPhone and as an SMS to a phone number. Unsuccessfully. As a result, my account was blocked and they offered to unlock it with recovery keys. Of course, I didn’t have them. So the activation of the new iPad stopped there. I had to wait an hour for the system to allow me to send the OTP again. If I lost my phone, my account would receive a scribe for the entire time I was abroad until I restored the SIM card.
So, one more time. If two-step verification is enabled:
- To manage your Apple ID, you will need to fulfill two of three conditions each time: enter a password, use a verified device, or specify a recovery key;
- If you forget your password, you'll need a recovery key and a verified device to reset it. Apple will not be able to reset or change your password on your behalf.
How to change your Apple ID recovery key
If you don't know your recovery key, it doesn't matter. It can be changed at any time, but only if you have access to the Trusted Device. For this:
- Visit appleid.apple.com
- Security → Edit → Replace lost key;
- Save the key (screenshot, note);
- Enter the new key in the field that appears so that it gains strength.
Once again, please note that the key cannot be copied. Take a screenshot and save it to your 1Password password manager, or write it down in another secure location.
How to add a trusted device
- Go to appleid.apple.com and log in with your Apple ID;
- Security → Verified devices → Check one more device;
- This list will include all your devices with Find My iPhone enabled. If the device you need is not there, try unlocking it and updating the list;
- Select the desired device;
- Enter the code into the form that will appear on his screen.

What's the result?
After all these manipulations you should get the following:
- Good Apple ID password to log into iCloud, Apple Music, App Store, etc.;
- Two-Step Verification in which you need to have access to a trusted device or mobile phone number to change any Apple ID settings or iCloud login on unfamiliar devices.
To have access to Apple services, each user must register an account, which is commonly called an Apple ID. Like any other account, this one also consists of a login and password. An email address is used as a login, which users “shine” always and everywhere, so it’s easy to recognize. Given the large range of programs for selecting and cracking passwords, it is possible to gain access to Apple ID today. Apple understands this, which is why they offer users the protection that is relevant today - two-step authentication. True, this requires a special code, and many users simply do not know where to enter the Apple ID verification code.
By the way, Apple offers two-step verification for iOS 8 (and earlier) users, and for those luckier (iOS 9 and older), two-step verification. You should still know where to enter the Apple ID verification code, because both methods are similar to each other.
What is two-step verification?
This is additional protection, thanks to which no one will gain access to the Apple ID even if he knows the login/password pair. To access it you will still need a specific set of numbers, which he will not have.
If you don't know where to enter your Apple ID verification code, see the following instructions.
- Go to the official website appleid.apple.com. Enter your login and password, secret code.
- We study the information about the verification, which is issued automatically. Next, click “Continue”. It may happen that information about two-step verification will not be displayed. You can find it in the "Edit - Security - Configure - Two-Step Verification" section.
- In the next window you must enter your phone number. It will receive codes via SMS to complete the verification. It is not necessary to choose your phone number. You can indicate the number of your parents, wife, etc.
- On the next page you need to check the phone number you specified. You should receive a code via SMS. Enter it in the window that appears. If it is not there, then click on the “Resend code” button.
- After entering the code, the program will prompt you to select auxiliary gadgets to receive a verification code. Here you can specify additional trusted smartphones. Each trusted smartphone will have to be confirmed via SMS.
- After confirmation, you will see the recovery key. It is complex and unchangeable. It needs to be kept in a safe place - it will be used if you suddenly forget the password to your Apple ID account or simply lose your trusted smartphone.
- In the next window you will have to enter the recovery code again. This may seem strange to some, but it's normal. This step focuses the user's attention on the importance of the key. Enter the code from the sheet without copying it programmatically.
- Lastly, we accept the verification conditions.

That's it. The check is activated. Now, when you try to sign in to your Apple ID account, you will need an Apple ID verification code. You now know where to enter it. The attacker also knows, but he will not be able to log into the account, because he simply does not have a trusted smartphone.
By the way, it is best to indicate a trusted phone number not of your own, but of a close relative. If suddenly someone steals your iPhone, they can easily log into your Apple ID, because the verification code will be on the same phone.
Two-Step Verification

There is no practical difference between verification and authentication. At least the user won't notice them. In both cases, you need to know where to enter the Apple ID verification code. In both cases, an SMS with a verification code is sent to the phone, after specifying which access to the account is granted.
Authentication is enabled in the settings. There is a menu item "Password and...". Authentication may also be available in iCloud settings, in the Apple ID tab - “Password and Security”. Click on "Enable". The protection will be enabled, but not yet activated.
Now we need to configure authentication. We enter a trusted number, wait for the code, and confirm the smartphone. Now the protection is activated, next you need to figure out where to enter the Apple ID verification code. When logging into any Apple service, you will need to provide a login and password. And then the code will be sent via SMS. It must be entered after the login/password pair.
What is the difference?

It’s easy to see that there are practically no differences between two-step verification and authentication. Both require an Apple ID verification code to sign in, so what's the difference?
Apple claims that two-factor authentication is more reliable and modern security. And although the user does not see the difference, the authentication system more effectively verifies devices and sends verification codes. Overall the optimization is much better.
Now you know where to enter your Apple ID verification code. But first, the protection must be turned on.
Conclusion
I highly recommend using this protection. Regardless of what operating system you have (old or new), use two-step authentication or verification, as this protection negates any efforts of thieves to find out access to your account. Well, if you don’t know where to enter the Apple ID verification code, then there will be no problems with this, because the user interface is so simple that even a child can figure it out.
Find out what to do if you forgot your iCloud security code for iCloud Keychain.
If you enter the iCloud Security Code incorrectly too many times while using iCloud Keychain, it will be disabled on your device and iCloud Keychain will be deleted. One of the following messages may be displayed.
- “The security code has been entered unsuccessfully too many times. Verify this iPhone from one of your other devices using iCloud Keychain. If there are no devices, reset iCloud Keychain."
- “There have been too many attempts to enter your iCloud Security Code. Verify this Mac from one of your other devices that uses iCloud Keychain. If there are no devices, reset iCloud Keychain."
If used, the device is trusted when you sign in. You don't need to enter an iCloud Security Code to use iCloud Keychain.
If you have access to a verified device that uses iCloud Keychain
You can create a new iCloud Security Code on another device that also uses iCloud Keychain.
On an iPhone, iPad, or iPod touch:
On a Mac running OS X Yosemite or later
On a device that has iCloud Keychain disabled, create a new iCloud Keychain that contains your username, passwords, and other Keychain items on the device:
A confirmation window will open on the device on which you created the new iCloud Security Code. Approve adding a new iCloud Keychain for your device.
If you can't access a device that uses iCloud Keychain
To reset iCloud Keychain, follow these steps:
Starting with iOS 7 and OS X 10.9 Mavericks, users of iOS devices and Mac computers now have the ability to. It stores current usernames, passwords for sites (including VKontakte), credit card information for easy payment, as well as information about Wi-Fi networks. Despite such a long-standing release, many people for some reason do not use this function. And in vain.
Synced passwords, card information, and other information are only stored on approved devices. In other words, when adding a new iPhone, iPad or Mac to Keychain, you will need to confirm the request from another gadget. How to set it up?
First, you need to go to the device settings, then to the iCloud section. Just below you will see the “Keychain Chain” function that needs to be activated.


During setup, you'll be asked to create an iCloud security code. This is needed to later add new devices, because then you will need to enter the verification code received via SMS, as well as the iCloud security code. It is not surprising that they approach data security so responsibly, since many can store cards with hundreds of thousands of rubles in their account in the Keychain.


However, if you want to add a new iPhone to Keychain, this operation can be confirmed from a trusted device. Be careful! Apple won't be able to help you recover your iCloud security code, so it's best to write it down somewhere just in case.


“Keychain Access” has become a thing for me - all passwords are conveniently synchronized between Mac and iPhone, and you no longer need to remember them.

How many people today trust computers and smartphones? Almost all of them store photos, location information, often credit card data and codes, and countless passwords.
The latter are the main security mechanism on the Internet; they store access to everything that the user would probably like to hide, which means they must be advanced and difficult to select. The number of such passwords accumulates, exceeds a hundred, and now no one is able to remember them.
To protect and securely store all this information, Apple came up with a tool called Keychain.
keys"?
At its core, it is a password manager developed by Apple specifically for its operating system. This tool was introduced with the release of Mac OS 8th iteration, released in 1998. Since then, this utility has been part of every Apple release, including OS X and iOS (since 2013, it has been referred to as “iCloud Keychain”).
It can store a variety of data on a Mac, such as passwords for websites, FTP servers, SSH accounts, shared networks, wireless networks, hidden notes, shared software and hardware, as well as certificates and encrypted disk images.
Product history
Initially, a similar mechanism was used in the PowerTalk application, which was an email client from Apple. The application was created back in the early 90s, and Keychain helped control all user data from the various email services that PowerTalk could connect to.
Due to the use of encryption, passwords were difficult to remember and recover. Therefore, a mechanism was needed that would allow the user to enter only one password (the master password), which would allow access to all mail services (each of which has its own login data and passwords).
This idea, despite its obviousness and usefulness, practically died the moment Apple decided to stop supporting PowerTalk. But with the return of Steve Jobs, this function returned and worked not only in one program, but also in the entire system.
Storage and Access
In Mac operating systems of the 10th generation and older, all Keychain files are stored in a special directory of the system; this data can also be found in a special application, which is located in the “Utilities” folder.
“Keychain Access” is free and open source software (the source code of the utility is freely available), which is distributed under the Apple Public License.
The Keychain file stores a lot of information, only notes and passwords are encrypted, everything else (names, links) is available to everyone.

Locking and Unlocking
By default, the Keychain file is protected by the same password, so the function becomes available immediately after logging in with your username and password. If necessary, it can be installed separately for this function.
Also, for greater security, you can set a blocking interval, for example, 15 minutes. In this case, if the computer has not been used for 15 minutes, when you try to use Keychain, it will require a password.
"Bunch of keys
Apple announced this product 15 years after the appearance of the original Keychain. In 2013, at the WWDC conference, along with iOS 7 version and OS X Mavericks, a technology was presented that allows you to synchronize all classified user data and securely store it.
This option is a kind of online storage that contains all user data, which includes: passwords from web pages, passwords from wireless networks, account information and credit card payment data (with the exception of security codes - CVV).
All this data is encrypted using the AES 256-bit standard and is available only to a specific user and only in applications adapted to work with this utility (they send a request to Safari, the browser checks the matches of the links and offers the application a password previously saved in the system).
The service’s capabilities also include the creation of long, complex and secure passwords for the sites on which the user registers.

"Bunch of keys
Getting started with iCloud Keychain is not at all difficult, but first of all you need to make sure that iOS 7.0.3 and later is installed on your gadget (smartphone or tablet), and OS X 10.9 and later is installed on your computer.
Setting up iCloud Keychain (instructions for Mac):
- First, you need to launch “Settings” (either from the Apple menu, which is hidden behind the apple icon in the upper left corner, or from the Dock).
- Select the iCloud submenu.
- Enter a password to unlock your computer.
- Enter your Apple ID details.
How to add a credit card to Keychain (instructions for Mac):
- Safari must be launched.
- Then go to the settings of this program.
- In the settings, select the Autofill submenu.
- Next to the “Credit Cards” sub-item, find the “Edit” button.
- Click on the “Add” button and enter your credit card information.

How to set up iCloud Keychain (instructions for iOS):
- Select the iCloud submenu.
- Then the sub-item "Keychain".
- Move the iCloud Keychain toggle switch to the ON position. Accordingly, to turn it off, you need to perform the opposite action, switch the toggle switch to the OFF position.
- After this, you will be asked to come up with a new password or enter an existing one (iCloud Keychain security code for activation), as well as attach third-party gadgets for confirmation.
- You need to launch Settings from the Home screen.
- Select the Safari submenu.
- Then the sub-item Password & AutoFill.
- Enter the password code.
- Select the Saved Credit Cards submenu.
- Add a credit card (enter the required information and click “Done”).
Password synchronization
Synchronizing data in Keychain Access is not a required option. Moreover, you can synchronize data bypassing iCloud (only on Mac computers).
To avoid synchronizing data with the cloud and subsequently storing it there, when activating the Keychain, you need to skip the step of creating a six-digit verification code. In this case, all data will be stored only on physical media, locally.
It is also possible to synchronize data using files stored in /Library/Keychains/. This is typically used on corporate networks and when there are several shared Mac computers. Unfortunately, synchronization often disappears when changing the password in the system on one of the devices (including Windows).

Access to "Keychain"
Before you receive all the information stored in the cloud, you must confirm the iCloud Keychain. This can be done via SMS or a second device.
In the first case, the user will receive a randomly generated passcode to confirm their identity or fully activate the iCloud Keychain feature. You can confirm from another device if the user has a gadget on which this function already works.
Security code
This is a special cipher consisting of 6 digits or a complicated alphanumeric combination, which is necessary in order to gain access to passwords and cards stored in the Keychain, as well as in case of loss of access to it.
Possible problems
Nothing is perfect, not even iCloud Keychain. No, we are not talking about security holes or data loss, but there are many problems associated with enabling this function and regaining access after updating, resetting and setting up a new device. A list of the most common questions and problems is presented below.
“iCloud Keychain” could not be set up due to the lack of an SMS code? If for some reason you do not receive an SMS message with a password code, you must:
- Check your cellular network connection.
- Make sure that the phone is capable of receiving SMS (the tariff plan and installed SIM card support this feature).
- Check whether the number is indicated to receive the SMS code. To do this, in the “Keychain” settings, find the “Advanced” sub-item and indicate the correct number in the “Verification number” item.
iCloud Keychain does not sync data between devices. In this case, completely disabling and enabling the function almost always helps. This must be done on all devices. After turning them back on, they will all receive the most current data from the server and continue to work as usual.

Can't find passwords saved in iCloud Keychain? Data about them and credit cards stored in the cloud can be found as follows:
- Go to Settings from the Home screen.
- Select the Safari submenu.
- Then the sub-item Passwords.
- The system will require you to enter a password or use Touch ID (fingerprint sensor) to confirm your identity.
- After checking, you can select any site and see the password for it.
Safari does not save data to Keychain Access and does not offer password guessing. This problem can be solved by activating the “Names and Passwords” toggle switch in the “Autofill” submenu in Safari settings.
Supported devices
iCloud Keychain is supported on all current Apple devices. This includes all computers that run the macOS operating system from the Mavericks generation and newer (almost all PCs from 2007 and newer).
This function also works on a number of mobile devices (all on which you can install the mobile operating system version 7.0.3). These include: iPhone from the 4th generation and newer, iPad from the 2nd generation and newer, from the 5th generation and newer.

For Apple technology users, it marked the emergence of another excellent service within iCloud - password synchronization using iCloud Keychain. Apple has done everything possible to make this feature easier to set up and use, but our readers still have a lot of questions about this new product.
What can iCloud Keychain do?
iCloud Keychain offers:
- synchronization of logins, passwords and data from Safari forms
- credit card data synchronization
- Wi-Fi password synchronization
Synchronization works on Macs with OS X 10.9, iPhone, iPod touch and iPad with iOS 7.0.3. When you activate Keychain in iCloud, a single cloud storage is created in which ALL your passwords are collected. All of them are simultaneously available from all your devices connected to the same iCloud account.
Please note that on Macs, iCloud Keychain only works with Safari! For users of Chrome, Firefox or Opera, Apple's new feature will be of little use, because there are no plugins that add support for these browsers and there will not be any. In this case, there are no alternatives to Safari on iOS either.
Initial setup of iCloud Keychain on Mac
Let’s say right away that for residents of Ukraine, Belarus and other CIS countries not listed in this list, activating Keychain Access from a Mac is the only way to properly configure this function.
Open your Mac settings, go to the iCloud remote, turn on the “Keychain” checkbox:
The Mac will prompt you to enable a password request for your user account immediately after waking up from sleep mode or removing the screen lock - of course, for additional security purposes. This suggestion can be ignored.
You will then be asked to create a Keychain PIN. By default, this is a four-digit number that you need to remember and enter when connecting each new device to your Keychain:

But this is not necessary either. Pay attention to the "Advanced" button. It opens several options regarding the PIN code:

The first will allow paranoiacs to set a code of any length using any characters, not just numbers. The second will generate the code automatically. The third will allow you to completely abandon the security code. But how will new devices be confirmed in this case? It's very simple - using your other devices.
Once you create or reject a PIN, setup is complete.
The initial setup of Keychain on iOS is similar - go to the “Settings-iCloud” menu and turn on the “Keychain” checkbox, after which you create a PIN. The problem is that you will be forced to enter a mobile phone number, and only Russia is supported from the CIS countries.
Now let's talk about connecting new devices to iCloud Keychain.
Connecting a new iOS device to iCloud Keychain
Go to the “Settings-iCloud” menu mentioned above and select “Keychain Access”:

Agree to enable the feature:

You will definitely need to enter your iCloud account password:

After this, the Keychain will go into activation standby mode.
As we said, when adding a new device to your iCloud Keychain, you have two alternatives:
- enter PIN code
- confirm connection from another device
On your iOS device, you will see a “Verify with code” button, clicking on which you can enter your PIN and immediately activate the function:

The backup option is confirmation from another device. As soon as you try to enable iCloud Keychain on one of your devices, all other gadgets connected to the same iCloud account and the same Keychain will receive notifications:

But this is not just a notification. By clicking on the banner, you will be taken to iCloud settings, where you will be asked to enter your account password as confirmation of consent to add a new device to your Keychain. After entering the password on any of your other devices, the new gadget is considered finally connected, and password synchronization via iCloud Keychain will begin.
Connecting your new Mac to iCloud Keychain
The process is identical to that described in the previous chapter of the review. You go to OS X settings, iCloud remote and turn on Keychain. Enter your iCloud account password.


Entering the PIN code does not require any special explanation:

If you don't want to enter your PIN, your Mac will remain in activation mode:

It’s quite difficult to miss the notification about the need to confirm a new device - in both OS X and iOS it will be visible: